
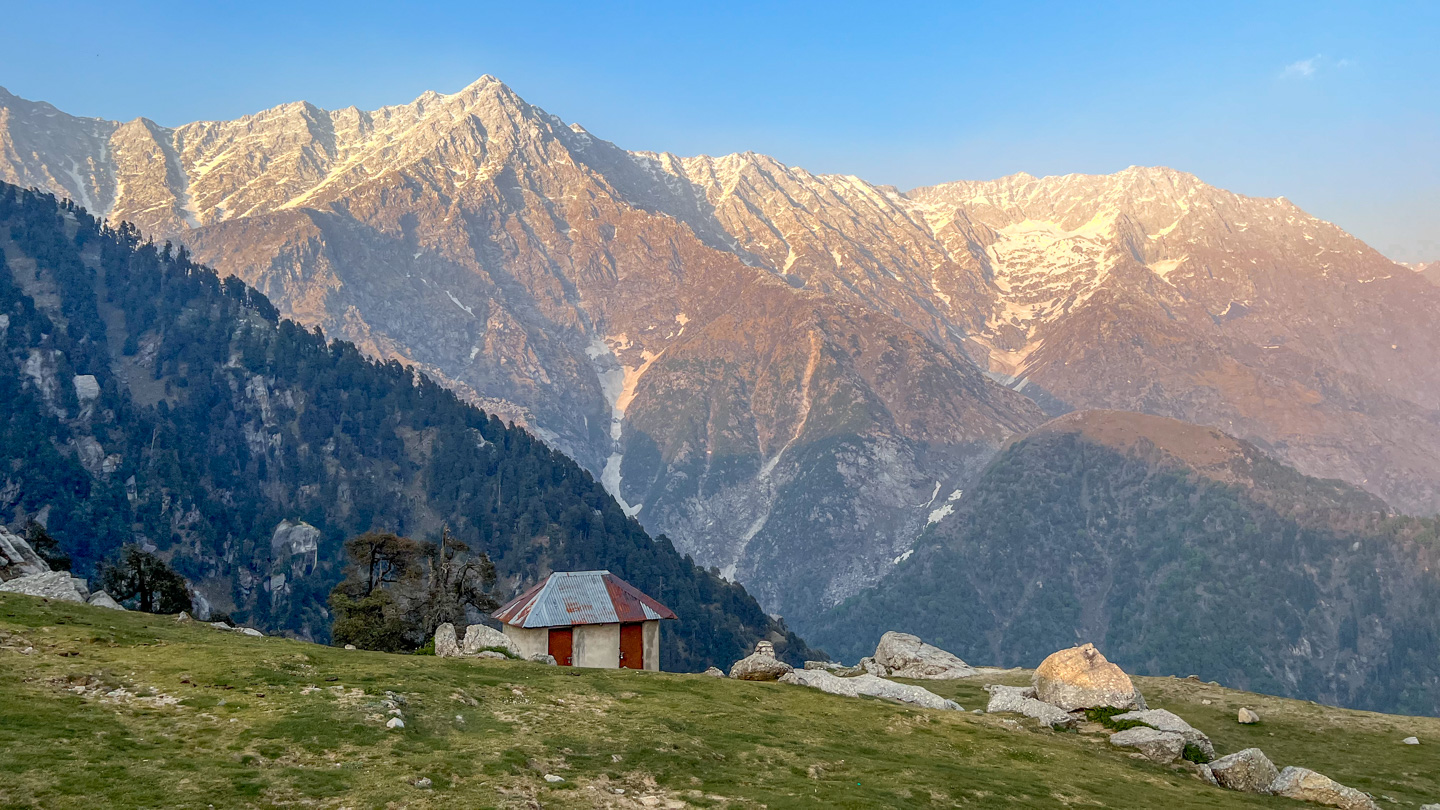
The trek to Triund Top, near Mcleodganj and Dhamarkot in the state of Himachal Pradesh, is a popular one. The reason? It is short and easy – great for first-time hikers. The reward for reaching the top is the gorgeous view of the snow-covered Dhauladhar range and green grass as far as the eyes can see. It is a sight to behold!
We were two girls who trekked to Triund all by ourselves and loved every bit of it. If you’re in the Dharamshala/Mcleodganj area then you definitely should hike to Triund top. The below-mentioned pointers are all you need to know for a successful Triund hike.
Note: Please do not litter when you travel. Carry your waste with you in bag and if possible pick up any litter your find.
- 1. At what height is Triund?
- 2. What is the best month to hike to Triund?
- 3. How long is the Triund trek?
- 4. Do I need a book a tour or hire a guide to trek to Triund?
- 5. Can the Triund trek be done in one day?
- 6. Should I spend the night at Triund?
- 7. How can I spend the night at Triund?
- 8. How much does it cost to do the Triund Trek?
- 9. At what time should I start the Triund trek?
- 10. What happens at the Gallu Devi Temple Forest Checkpoint?
- 11. What is the Triund trek route like?
- 12. What to Pack for the Triund Trek?
- 13. Are there places I can trek to beyond Triund?
1. At what height is Triund?
Triund top is at the height of 2,850 m (9,350 ft). The elevation gain during the trek is about 914 metres (3,000 feet).

2. What is the best month to hike to Triund?
The trek to Triund top can be done all year round except for the rainy months of July and August, and the peak winter months of January and February. In December, you can expect the first snowfall on the trek. The spring and summer months of March to June have the best weather conditions to trek. Though post-monsoon months have the clearest views of the mountains during the trek.
We went in late April and during this time there is a lot of haze due to forest fires. Hence, the view of the valley and mountains during the trek wasn’t very clear.

3. How long is the Triund trek?
There are two main Triund trek routes: One from Dharamkot (via Gallu Devi Temple) and one from McLeodganj (via Bhagsu)
1. Dharamkot (via Gallu Devi Temple): 7 km and 4.5 hours at an average pace one way
The route up from Dharamkot goes via Gallu Devi Temple. This is the preferred route because it is not only the easier of the two but also a very beautiful one through Rhododendron and Oak forests. Remember to go up from Zostel via the staircase. After reaching Gallu Devi temple, you’ll have to take the path going right. It’s not difficult to find and there is a shop and checkpoint there so you’ll be sure of where you’re going.
If you want to shorten your hike to about 5.45 km and 4 hours approx., then take a cab to Gallu Temple Checkpoint. We took a cab from near Zostel in Dharamkot to Gallu Temple and it cost a whopping Rs. 500 after bargaining! The road to the temple is quite bad and hence the cab guys charge quite a bit.

2. Mcleodganj (via Bhagsu Falls): 9 km and 6 hours at avg pace one way
There is another trek route to Triund that goes via Bhagsu Fall and Shiva Cafe. It is considered to be more challenging because certain sections are steep and slippery and hence the trek takes more time to complete. It is, therefore, not recommended for beginner hikers. Per my observation, most tour groups take this path. They start at Mcleodganj Chowk, go through the falls and then to Triund. So if you’re a beginner and planning to book a tour, read/enquire about the route details carefully before making your booking.
In this blog post, we will only discuss the Dharamkot/Gallu Devi Temple Route.
4. Do I need a book a tour or hire a guide to trek to Triund?
You don’t really need a guide or tour. If you’re walking alone, you might prefer to hire someone for company’s sake but it’s unnecessary especially if you take the Gallu Devi Temple route.
As I mentioned before, we were two girls who did Triund trek without a guide. At no point did we feel that we should have come with a guide. You will keep bumping into people from time to time since it is a popular hike. It’s perfectly safe and easy!
5. Can the Triund trek be done in one day?
Yes, it absolutely can. A day hike is best if you’re short on time and can spare only one day. Remember that you’ll need to be physically fit to hike up and then back the same day. It would be about 12-18 km depending on your route and take you 5-7 hours minimum not counting the time you’ll spend at the top.
6. Should I spend the night at Triund?
If you hike a lot then staying the night may not be interesting for you since you’ll complete your journey up quite fast and have plenty of time to spend there before you come back down.
For beginners or those who don’t hike often, I would highly recommend doing a Triund night stay for these reasons:
- If you’re hiking all the way up, you should be able to have ample time to walk around Triund Top and soak in the view
- Hiking up and down on the same day can be tiring. We very much enjoyed our leisurely walk up to Triund and were grateful for the rest we got at night before having to go back.
- The view in the evening during sunset is spectacular. The way the sun turns the mountains golden is a sight you should not miss.
- Triund is best explored in the evening as it isn’t blazing hot
- If the sky is clear, you’ll see a beautiful starry sky during your Triund night stay

7. How can I spend the night at Triund?
To spend the night at Triund, you can either pitch your own tent or stay at an established camp.
If you’re going to pitch your own tent
If you’re planning to pitch your own tent, note that it is technically not allowed but people still do it. Make sure you walk further toward the Triund head (which goes to the Bhagsu route) and pitch a tent there hidden by the many rocks. Also, only pitch a tent around sunset just before it gets dark so no one bothers you saying it isn’t allowed.
If you’re going to be staying at an established camp
If you’re going on a weekend, you definitely need to have a camp/stay pre-booked. There might be a lot of rush so you may not get a camp. In case you’re unable to prebook a camp, I’d suggest hiking up as early as possible so you can find an empty camp or hike back down if you can’t.
If you’re going on a weekday, it’s your wish if you want to prebook or not. Note that if you’re not pre-booking then it is best to reach there as early as possible and ask for options.

We prebooked our camp through Dhauladhar’s Doors just a night prior to going. Dhauladhar’s Doors is located at Triund top and has 2 tents, a cottage with rooms, a kitchen and a dining area. It also had a separate tent that is a toilet – a dug-out pit to do your thing with a shovel provided to cover it up with mud. You can book either the tents or a room by calling Mr Raj at +91-9736641934. They provide simple and tasty dinner (Dal, Chawal, Sabzi, salad, papad) and breakfast (bread omelette or Maggi and tea). In the tent, you’re given a cotton mattress and a sleeping bag. This cost us Rs. 1,200.

8. How much does it cost to do the Triund Trek?
Day hike without a guide: If you hike in one day without a guide, then it’ll cost you nothing except any food and water you buy along the way or sticks you rent out.
Overnight stay with self-booked camp: If you’re staying the night, the camp will cost you about Rs. 700-1500 per person. Lower side on reaching there and booking and higher side on pre-booking.
Tours to Triund: These would cost in the range of 800-1800 depending on the duration of the tour, camping site and provisions.Here’s one option: Triund trek with camping
How much the two of us spent:
Cab to Gallu Devi temple: Rs. 500
Camp: Rs. 2,400 (inclusions: tent, dinner, breakfast)
Stick: Rs. 100 (Rented stick for Rs.100 each, returned it and got Rs. 50 each back)
Food and beverages at magic view cafe: Rs. 300 (Maggi, bread omelette, coffee, tea, water refill)
Beverages at Triund top: Rs. 50 (coffee and tea)
Gatorade and water at triund top: Rs. 150
Food and beverages at magic view cafe: Rs. 400 (Maggi, bread omelette, coffee, tea, water refill, Gatorade)
Cab from Gallu Devi Temple to Dharamkot: Rs. 500
Total for 2 people: 4,400
Cost for 1 person: 2,200
9. At what time should I start the Triund trek?
Now that you’ve decided if you doing a day hike or staying the night let’s get into the time to leave. Remember that we will only discuss the hike through the Gallu Devi Route in this article so here goes.
For Day Hikers
If you’re a day hiker, then you have to start the hike before 11 AM. After that, you won’t be allowed up without a camp booking. It’s safer to cross the checkpoint at Gallu Devi Temple before 10 AM.
I’d suggest starting as early as possible. Most people start between 7-9 AM. The reason for this is that if you’re slow, you’ll have plenty of time to spend at Triund and some more to return before dark. If you’re fast, you’ll have more time to spend at Triund or you can even go up to Snowline Cafe.
For Campers
Take note that you are not allowed to cross the Triund checkpoint after 2 PM.
If you’re setting up your own camp or haven’t pre-booked a camp, then leave before 11 AM. If you have already prebooked a camp, you can leave between 11 AM and 2 PM as well.
Here’s my suggestion:
Leave before 11 AM regardless. If you’re a slow hiker, you’ll get plenty of time at Triund before sunset and if you’re fast you’ll get even more.
We left at 12:30 PM, took tons of breaks for various reasons and reached by 5:30 PM. The issue with this was that after arriving so late, we had only one hour to enjoy the sunset and find our camp. We couldn’t explore Triund Top properly this evening but consoled ourselves thinking that it’ll be okay to explore it the next day. But the next morning we noticed, to our dismay, that it was not only very sunny and hot but also that the mountains aren’t really visible. I would have rather reached much earlier the previous evening and left Triund early the next morning.

10. What happens at the Gallu Devi Temple Forest Checkpoint?
On reaching the Gallu Devi Checkpoint, you will be stopped by a police officer who will check your Government ID card and make a note of your name and ID number in a register. They will also take a photocopy of your ID card. If you reach the checkpoint after 11 AM then he’ll also check your camp booking confirmation.
Further, the officer will check your bag for alcohol and speakers. These are not allowed on the trek.
Don’t forget to rent a stick if you don’t have your own trekking pole. It is available at the checkpoint shop. It costs only Rs. 100 to rent and you get Rs. 50 back on returning it. This stick will help you immensely on your way up to Triund by taking your body weight off your legs and dividing it between your upper body and lower body. Your knees will thank you for lowering the stress on them and your back for better posture. As a result, your balance and speed will increase.

11. What is the Triund trek route like?
Here’s a video of my experience. It’s the very first long-form video I have ever edited, so please be kind.
First Half
The first half from Gallu Devi Temple is a gradual ascent through Rhodendron and Oak forests. A lot of the trek will be shaded by these trees which will lower the intensity of the sun on you. You’ll not get very tired.

The floor will be a mass of leaves and will gradually start having more rocks. From time to time you’ll find clearings that’ll give you a view of the Dharamshala area or rather the Kangra Valley. It’s quite a view on a clear day.

You’ll reach the mid-point of the hike with just a few breaks here and there to catch your breath. The midpoint is marked by two cafes – Magic View Cafe and Best View Cafe. Magic View is the oldest Chai shop built in 1984 and the better one too. (Trust me, we tried both and the person at the other cafe didn’t care about his business at all)

Second Half
The second half begins to get steeper and steeper. But it’s perfectly fine – nothing scary just more tiring. The ground will have more rock than leaves and the trees will clear out more and more.
The trail will also start to get more beautiful.

The final 20-30 mins will be a bit gruelling. You’ll feel like giving up but you’ll see the route get greener telling you that you’re just about to reach. Carry on and you’ll be rewarded in just a bit.

At Triund
The moment you near the very last few steps to Triund Top, you’ll get a glimpse of the mighty Dhauladhar Mountain Range and trust me, all your tiredness will melt away and be replaced by sheer awe and gratitude.

A few more steps and you’ll see green grass and rocks all over. You can grab a tea or coffee and bite at the very visible tea stall! Just spend the evening walking around, breathing clear fresh air and being mesmerized by the view.
Be sure to get settled in your camp before dark.
To find your specific camp or a random camp to stay in (if you’ve not pre-booked your stay) simply ask the person at the shop. When we got there our camp person located us himself so it was quite convenient.
12. What to Pack for the Triund Trek?
Basics (will be needed by day hikers and by campers)
- Hiking Shoes: Wearing hiking shoes will ensure you get a better grip, lessen the chance of a sprain and increase your speed on the trail. If you’re buying a new one, please break into them before attempting this hike or any other. Shop for hiking boots on Amazon
- Hiking Socks: Hiking socks keep your feet dry and less sweaty. But mainly, it keeps your feet cushioned which stops painful blisters from forming as your hiking shoe rubs against the foot while you walk
- Comfortable Backpack: Backpacks that have straps with good padding are ideal! If you wear a thin-strapped or fashion backpack, you will feel the weight of the bag a lot through the hike and it’ll weigh you down. Day hikers can carry a small backpack (10-20 L) and not worry about this too much but campers will need to be a lot more thoughtful about this as they’ll be carrying more weight. A 30-40 L backpack will be sufficient.
- Rain Cover for Backpack: This will keep your bag and the stuff inside dry in the rain! Buy a Raincover on Amazon
- Water Bottle: We carry foldable bottles like this one because it literally has no weight but you could surely carry any other as well. Do carry one or two 1L bottles and refill them at the stores on the way. In all probability, you may end up having to buy a bottle of water anyway. Note that a bottle of packaged water is priced at Rs. 50 though the MRP is Rs. 20. Buy a foldable bottle on Amazon
- Sunscreen: As you get closer to the sun, the chance of damage by UV rays increases so applying SPF is essential. An SPF 30-50 sunscreen will do. Reapply after 4 hours. Linking two sunscreens I usually use!
Buy face sunscreen on Amazon | Buy body sunscreen on Amazon - Sunglasses: These are necessary to protect your eyes.
- Cap: Again this will protect your face and hair from the sun. I personally don’t usually wear a cap though!
- A snack or two: If you’re going on a day hike, carry some snacks for the trek to Triund. If you run out, you can always restock from the shops on the trail but note that everything will be double the price. We carried Glucose Tablets and Gatorade which really helped keep our energy levels up.
- Stick/Hiking Pole: You can either bring your own hiking pole if you have one or rent a stick from the store at the checkpoint. It costs Rs. 100 to rent a stick and on returning it you get Rs. 50 back.
- Cash: Google Pay etc. don’t work very well on the route as connectivity is dodgy. Best to carry at least Rs. 2,000. Even if you go up there and decide to stay the night, you’ll have cash on you to pay up!
- Govt. ID Card: You may need this at the checkpoint depending on the time your start your hike.
Also, depending on the month you’re travelling in, day hikers can also carry a woollen layer like a jacket or sweatshirt. I would always carry a wind cum rain jacket in any season but that’s up to you!
For campers only (in addition to the above)
It gets really chilly at night you will need to carry woollen layers in addition to some other items. While you’re hiking you won’t feel cold at all, so all your woollens will be in your bag. These woollens will add a bit of weight to your bag so stressing on this again – carry a good, sturdy, well-padded backpack. It is best to shop for items given below at Marks and Spencer (thermals), Uniqlo (down jacket and thermals), Columbia, Decathlon, and Wildcraft. All these brands are present in India!
- Thermal: This is just needed if you’re hiking in the chillier months! We did not carry this in April and didn’t think we needed it either.
- Sweater or Fleece: This will be the first layer after your t-shirt.
- Padded or Down Jacket: Padded jackets are ideal for treks as they insulate even after they get wet. But if you don’t have one, carry a down jacket instead. Make sure you carry a lightweight packable jacket.
- Windbreaker cum Raincoat or Poncho: This is extremely important. The wind at night bites and it can rain at any time. If you don’t wish to get sick it is best to buy one if you don’t already own one.
- Gloves: Yes, it is that cold and you will probably need gloves. We sure did!
- Wollen Cap/Beanie: Protecting your head from the cold is ultra important, even while you sleep.
- Warm Socks: It is good practice to change your socks before you sleep on a trek. Wet socks can make you ill. Warm socks (plus a beanie) are essential to staying toasty all night.
- Change of clothes (optional): Carry an extra change of clothes. You should change your T-shirt once you reach the campsite so you don’t fall ill wearing a wet one. A spare set of pants helps in case the one you’re wearing gets wet. That said, we still didn’t carry a set of pants to reduce weight.
- Head Lamp: While you can get by with your phone torchlight, it is best to carry a headlamp for convenience. You can then be hands-free in the night while exploring, looking for peeing spots, or even inside your tent. I just hung mine from the centre hook of the tent and had our own bulb of sorts!
13. Are there places I can trek to beyond Triund?
Yes, you can trek further than Triund as well. If you’re planning to camp at Triund, then you can definitely hike up to Snowline Cafe the next morning (2 km further) and then hike down to Gallu Devi Temple. However, there are longer treks that go beyond Triund as well. These are as follows:
McLeodganj- Triund- Laka Glacier- McLeodganj: 10,600 ft; 11- 13 km one way; 2-3 days, moderate-difficult
McLeodganj – Triund – Laka Glacier- Indrahar Pass-McLeodganj: 14,245 ft; 4 days; 22 km one way; difficult
That’s all folks! I would love to answer any questions you may have about the trek to Triund. Do drop them below in the comments section and I’ll answer them asap. Have a fantastic trek!
Good morning, To be honest First time i have read so beautiful detailed article.
This is exactly what I was looking for and everything I was lookingfor. Extremely detailed and useful. Huge thanks for writing this. I couldn’t find a more comprehensive guide anywhere else.
You’re most welcome. Enjoy the trek. Triund is beautiful!
Do I need downjacket and snow gloves for a Trek in the last week of march
Yes, for the down jacket, it is still quite cold. I’m not sure about snow gloves in particular but taking some warm gloves is always better.